Freehand embroidery, or “free embroidery,” is a beautiful and expressive art form that allows beginners to explore their creativity using just a needle, thread, and fabric.
Getting Started with Freehand Embroidery: A Beginner’s Guide
Unlike machine embroidery, freehand embroidery is done manually, giving each piece a unique, handcrafted touch.
Whether you’re looking to decorate your clothes, create art pieces, or add a personal touch to home items, freehand embroidery is a skill anyone can learn. This guide covers everything beginners need to get started with freehand embroidery.
What is Freehand Embroidery?
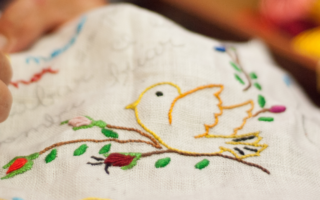
Freehand embroidery is a technique that lets you draw directly onto fabric with thread. Unlike counted cross-stitch or needlepoint, there’s no strict pattern to follow. Instead, you have the freedom to draw any shape, design, or image you like. This creative approach makes it perfect for those who enjoy art and want to see their ideas come to life in a textile medium.
Materials You’ll Need
Starting freehand embroidery doesn’t require a lot of fancy equipment. Here’s a basic list to get you started:
- Embroidery Hoop – Hoops come in various sizes, but a 4-6 inch hoop is ideal for beginners. It keeps your fabric taut, making stitching easier and more precise.
- Fabric – Cotton or linen is usually recommended for beginners because they’re sturdy and easy to work with. Avoid stretchy fabrics until you’ve mastered basic techniques.
- Embroidery Thread – Embroidery floss, which is made of 6 strands, is available in a wide range of colors. You can use all 6 strands for thicker lines or separate them to create delicate details.
- Needles – Embroidery needles have a sharp tip and a long eye for threading multiple strands of floss. A size 7 or 9 needle is a great choice for beginners.
- Scissors – Small, sharp scissors are perfect for cutting threads and trimming your work neatly.
- Water-Soluble Pen – For sketching your design on the fabric before you start stitching, a water-soluble or erasable fabric pen is helpful.
Basic Stitches to Learn
Mastering a few basic stitches will allow you to create various textures and patterns. Here are the most common ones for beginners:
- Running Stitch – This is the simplest stitch, ideal for creating borders and outlines. Simply push the needle in and out of the fabric at regular intervals.
- Backstitch – Backstitch creates a solid line and is excellent for outlining. It’s made by stitching backward to connect each stitch.
- Split Stitch – Perfect for outlines with a bit of texture. Each stitch is split in the middle, creating a braided effect.
- French Knot – For a three-dimensional effect, French knots are wonderful. Wrap the thread around the needle, then push the needle back into the fabric close to where you started.
- Satin Stitch – Used to fill in shapes with a solid color. It involves tightly-packed stitches, laid side by side, to create a smooth finish.
- Lazy Daisy – A great stitch for making petals and floral designs. Make a loop, secure it, and you’ve got a petal!
Choosing Your First Project
For your first project, it’s best to choose a simple design, such as a small flower, heart, or monogram. These are easy to manage and give you a chance to practice basic stitches. Starting small ensures that you can complete your piece without feeling overwhelmed, and each finished project builds confidence.
Step-by-Step Guide to Start
- Prepare Your Fabric – Place your fabric in the embroidery hoop, tightening it so the fabric is taut.
- Draw Your Design – Use a water-soluble pen to sketch your design on the fabric. This outline will help guide your stitches and keep your work neat.
- Start Stitching – Begin with simple stitches like the running stitch or backstitch to create your outline. Once you’re comfortable, try adding texture with satin stitches or French knots.
- Practice Your Tension – Keep your stitches even but not too tight. Practicing tension control will prevent puckering and give your embroidery a smooth finish.
- Finish Up – When you’re done, tie off the thread at the back, and trim any excess. Rinse off your fabric if you used a water-soluble pen.
Recommended Embroidery Tutorials for Beginners
And to help you learn free embroidery in practice, I have put together some tutorials for you. The best ones!
- Hand Embroidery 101 | Beginners Guide to Embroidery, Stitch Tutorials, and Pattern!
- Hand Embroidery for Beginners || 14 basic embroidery stitches by Let’s Explore
- How to start and end embroidery stitches
- Embroidery for beginners – Stitches, knots, needle threading & more – Complete Basics Series
- Embroidery for beginners | TOP 10 stitches!
- 20 Basic Hand Embroidery Stitches Sampler for Absolute Beginners
- simple flower hand embroidery tutorial
- VERY EASY LITTLE FLOWERS EMBROIDERY/5 MINUTE EMBROIDERY FOR BEGINNERS
Tips for Success
- Practice, Practice, Practice – The more you practice, the better your stitches will become. Try making a “sampler,” a piece of fabric where you can practice different stitches.
- Experiment with Colors – Don’t be afraid to mix colors. Variegated threads or contrasting colors add visual interest to your piece.
- Don’t Worry About Perfection – Freehand embroidery is meant to be expressive, so don’t stress if each stitch isn’t identical. Embrace the uniqueness!
- Find Inspiration – Look at embroidery designs online, on social media, or in nature. Inspiration can come from anywhere!
- Take Your Time – Freehand embroidery is a slow and meditative craft. Enjoy the process as much as the result.
Final Thoughts
Freehand embroidery is an enjoyable, relaxing hobby that allows for endless creativity. For beginners, it’s an accessible way to start creating art on fabric without a big investment in tools or materials.
Start small, master a few basic stitches, and let your creativity guide you as you develop your skills. With each project, you’ll discover new possibilities and gain confidence in your stitching.
Read More: 5 Crochet Christmas Decorations to Add a Personal Touch